Part 1: Getting Started
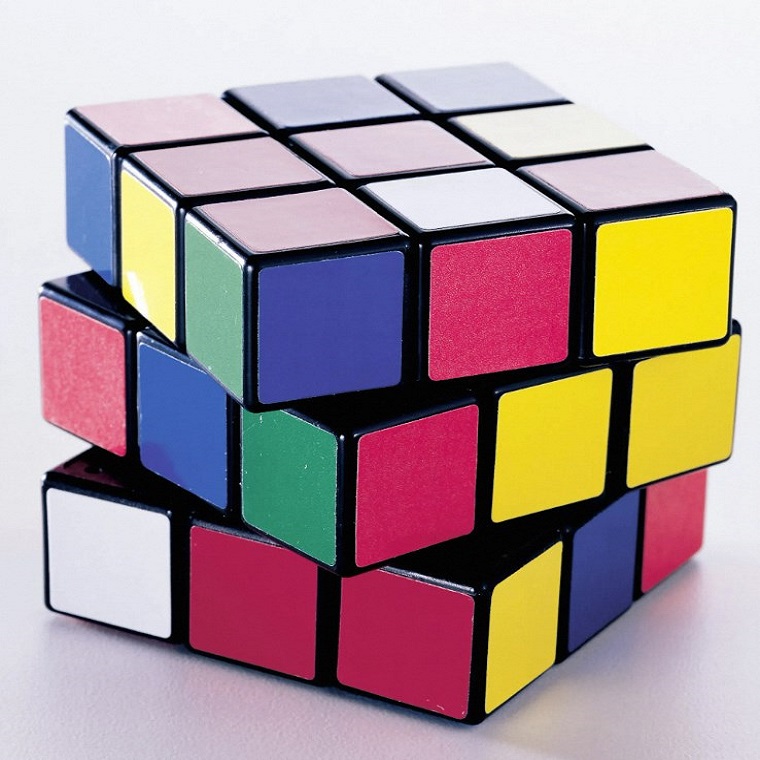
The Rubik’s Cube is a classic puzzle that has confounded and entertained people for decades. Whether you’re a beginner or a seasoned pro, disassembling a Rubik’s Cube can be a fun and rewarding experience. Here’s a step-by-step guide to help you do just that.
1. Gather your tools:
Before you begin disassembling your Rubik’s Cube, make sure you have the right tools on hand. You’ll need a flathead screwdriver, a pair of needle-nose pliers, and a small bowl or container to hold the pieces as you remove them. Having the right tools will make the process much smoother and help you avoid damaging the cube.
2. Familiarize yourself with the cube:
Before diving into the disassembly process, take some time to familiarize yourself with the Rubik’s Cube. Study the arrangement of colors and patterns on each face and observe how the individual pieces interlock. Understanding the cube’s structure will provide valuable insight into the assembly process and facilitate a smoother disassembly. By taking this moment to assess the cube, you’ll gain a better grasp of its inner workings, making it easier to take apart and ultimately reassemble. This tactile exploration can also enhance your overall understanding of the cube’s mechanisms. Give attention to how the puzzle is constructed and appreciate the intricacy of its design, which will not only assist in disassembly but may also deepen your appreciation for this iconic puzzle.
Part 2: Disassembling the Cube
Now that you’re prepared, it’s time to start taking your Rubik’s Cube apart. Follow these steps to disassemble the cube and unravel its intricate design.
1. Start by removing the center caps:
When disassembling a Rubik’s Cube, grab your flathead screwdriver and carefully maneuver it under the center caps on each face. These small, inconspicuous covers conceal the fixed center components of the cube, which remain stationary. As you delicately pry off the caps, you’ll reveal the underlying screws. With the center caps removed, you’ll gain access to the inner mechanisms of the cube. This step is critical in preparing the cube for further disassembly, allowing you to reach the screws that anchor the puzzle together. The act of removing the center caps signifies the start of the intricate disassembly process, offering a glimpse into the complex inner workings of the Rubik’s Cube. Take care during this step to avoid damaging the caps or the cube’s surface, ensuring a smooth and successful disassembly.
2. Loosen the screws:
Absolutely! After completing the disassembly process and understanding the Rubik’s Cube’s internal mechanism, the next step is reassembly. This involves reattaching the corner pieces to the cube while ensuring that each piece securely fits into its assigned position. Attention to detail is crucial, as it is essential to align each corner piece carefully to accurately form the cube’s structure. Take your time to ensure that the orientation of each corner piece is correct, as they must be aligned properly to maintain the cube’s integrity and functionality.
Once all the corner pieces are successfully reattached, progress to reassembling the edge pieces, following a similar methodical approach. By systematically fitting the edge pieces back into place, you will recreate the Rubik’s Cube’s intricate pattern and restore its functionality. This reassembly process not only serves to reconstruct the puzzle but also provides an opportunity to deepen your understanding of the cube’s internal mechanisms. By paying attention to the details during reassembly, you’ll gain a deeper appreciation for the complexities of the Rubik’s Cube.
Part 3: Removing the Edge and Corner Pieces
With the center pieces removed, you can now move on to the edge and corner pieces of the Rubik’s Cube. This is where the puzzle starts to reveal its inner workings.
1. Remove the edge pieces:
To disassemble the Rubik’s Cube, once you have removed the center caps and unscrewed the cube, use needle-nose pliers to carefully grasp the edge pieces. Apply gentle pressure to pull them away from the cube’s structure. These edge pieces are secured by small tabs and slots. It’s crucial to exercise caution and avoid applying excessive force or bending the plastic. As you remove each edge piece, take note of its position and store it in a bowl or container. This will help keep track of the puzzle’s components. This careful and methodical approach will prevent any loss or misplacement of the pieces. It will also facilitate a seamless reassembly process later on. The use of needle-nose pliers ensures a steady grip. It helps prevent damage to the cube during disassembly. Ultimately, this allows for a smooth and successful reassembly.
2. Take out the corner pieces:
Similar to the edge pieces, the corner pieces of the Rubik’s Cube are also secured by tabs and slots. As you progress with the disassembly process, make use of your pliers to delicately detach the corner pieces from the cube. Exercise caution to avoid applying excessive force or causing any damage to the cube’s components. Gently removing and storing the corner pieces in your container will help to keep track of the puzzle’s components and ensure they remain intact for the reassembly process.
Upon successfully removing all the pieces, you will be granted a clear view of the cube’s inner mechanism. This step isn’t just about disassembling the cube; it also presents an opportunity to gain a deeper understanding of its intricate design and internal structure. Observing the inner workings of the Rubik’s Cube can provide valuable insight into its mechanisms, enhancing your overall appreciation and knowledge of this iconic puzzle.
Part 4: Reassembling the Cube
Now that you’ve successfully disassembled your Rubik’s Cube, it’s time to put it back together. Follow these steps to reassemble the cube and restore it to its original state.
1. Start with the corner pieces:
After completing the disassembly process and understanding the Rubik’s Cube’s internal mechanism, it’s time to move on to the reassembly stage. Start by reattaching the corner pieces to the cube, ensuring that each piece securely fits into its designated position. Attention to detail is crucial here, as it’s essential to carefully align each corner piece to form the cube’s structure accurately. Take your time to ensure that the orientation of each corner piece is correct, as they must be aligned properly to maintain the cube’s integrity and functionality.
Once all the corner pieces are successfully reattached, proceed to reassemble the edge pieces, following a similar methodical approach. By systematically fitting the edge pieces back into place, you’ll recreate the Rubik’s Cube’s intricate pattern and restore its functionality. This reassembly process not only serves to reconstruct the puzzle but also provides an opportunity to sharpen your understanding of the cube’s internal mechanisms. By paying attention to the details during reassembly, you’ll gain a deeper appreciation for the complexities of the Rubik’s Cube.
2. Reattach the edge pieces:
Like the corner pieces, the edge pieces of the Rubik’s Cube must be fitted back into their proper positions. Take your time to ensure that each edge piece is correctly aligned and fully inserted into the cube. As you work, the puzzle will slowly start to take shape again, and you’ll begin to see the familiar patterns and colors emerge. Once all the pieces are back in place, you can tighten the screws under the center caps and replace the caps themselves to complete the reassembly process.
In conclusion, disassembling a Rubik’s Cube can be a challenging yet rewarding experience. By following this step-by-step guide, you can gain a deeper understanding of how the puzzle is constructed and enjoy the satisfaction of successfully taking it apart and putting it back together. So grab your tools and get ready to dive into the fascinating world of the Rubik’s Cube!