Even though it’s February, it’s never too early to get inspired for next fall’s crafting season! Here are 6 creative fall arts and craft ideas that go beyond the usual suspects:
1. Whimsical Leaf Mobiles: Dance with Nature’s Colors
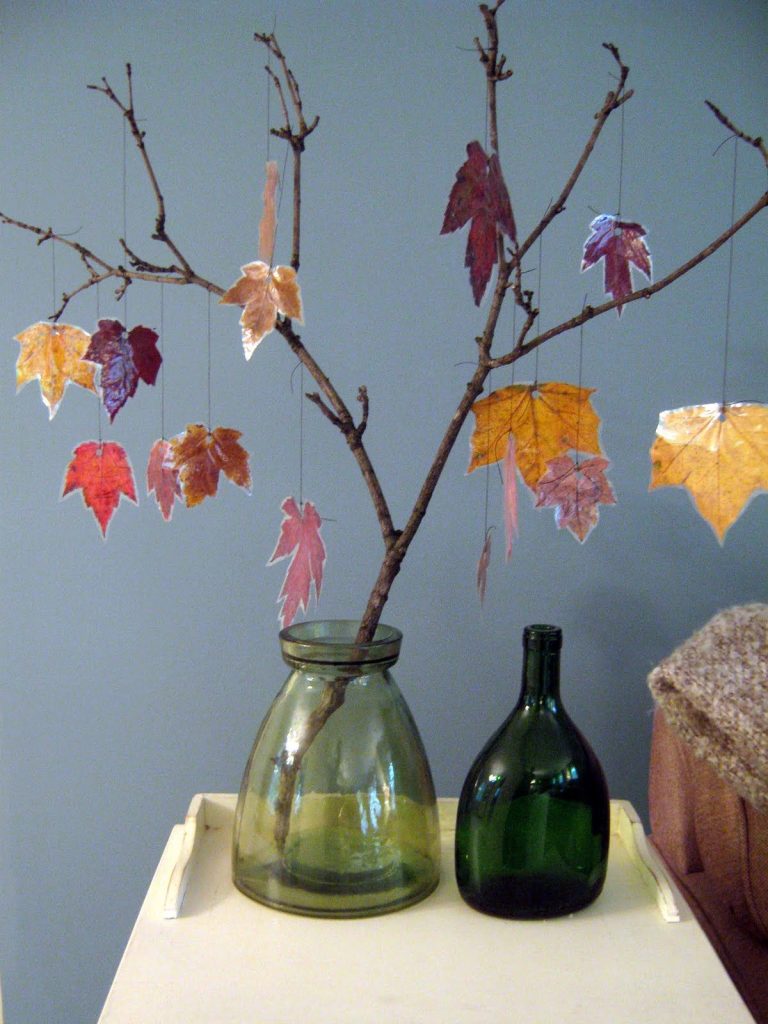
Imagine the gentle breeze stirring a flurry of colorful leaves, not on the ground, but gracefully swirling overhead. You can create this enchanting scene with an Upcycled Leaf Mobile.
Materials:
- Fallen leaves in various shapes and sizes
- Thread or fishing line
- Thin branches or dowels
- Scissors
- Paint, glitter, or fabric scraps
Instructions:
- Gather your leaves: Collect a variety of fallen leaves with interesting shapes and colors. Ensure they are dry and clean.
- Create the base: Tie several thin branches or dowels together to form a mobile structure. Adjust the length of the branches for desired levels.
- Attach the leaves: Cut thread or fishing line to desired lengths. Tie one end around the stem of a leaf and the other securely to the mobile structure. Repeat for various leaves, positioning them at different heights and angles.
2. Nature’s Whisper: Sculptural Storytelling with Found Objects
Autumn’s bounty extends beyond leaves. Pinecones become miniature pine trees, acorns transform into playful creatures, and twigs weave tales of their forest journeys. Embrace this abundance with Nature-Inspired Sculptures.
Materials:
- Pinecones, acorns, twigs, dried flowers, and other natural materials
- Hot glue gun or craft wire
- Optional: Paint, markers, or other embellishments

Instructions:
- Gather your treasures: Explore nature’s offerings. Look for pinecones with interesting shapes, acorns in different sizes, and unique twigs with branching patterns. Dried flowers and seed pods can add pops of color and texture.
- Let your imagination guide you: Sketch or simply envision what you want to create. Will your pinecones become majestic owls perched on a twiggy branch? Perhaps your acorns transform into playful squirrels gathering fallen leaves (made from dried flowers!).
- Bring your vision to life: Use hot glue or craft wire to connect your natural materials, following your design. Secure larger pieces first, then add smaller details like eyes, wings, or leaves.
3. Pumpkin Seed Symphony: A Crunchy Mosaic Masterpiece
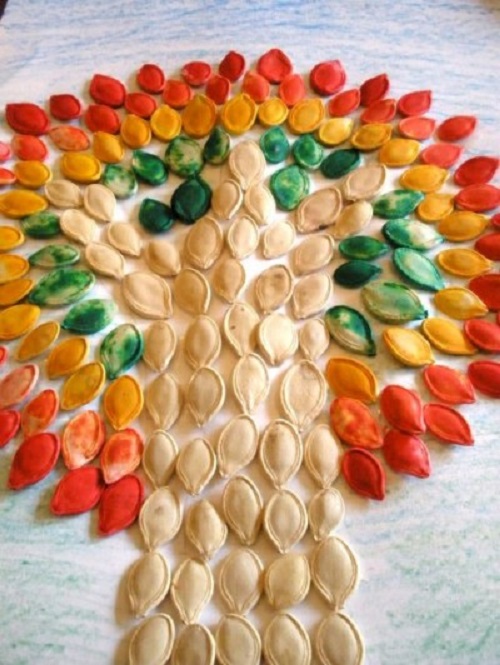
Pumpkins are synonymous with fall, but what about their seeds? Give them a new life with a Pumpkin Seed Mosaic Art project.
Materials:
- Roasted and cleaned pumpkin seeds
- Canvas or cardboard
- Craft glue
- Optional: Different colored pumpkin seeds, paint, or markers
Instructions:
- Prepare your canvas: Choose a canvas or cardboard base for your mosaic. Consider the size and design you have in mind.
- Design your masterpiece: Sketch or plan your design on the canvas lightly. This could be a simple geometric pattern, a picture of a leaf, or even a detailed pumpkin!
- Start mosaic-ing: Apply a small amount of glue to a specific section of your design. Carefully place pumpkin seeds, one by one, onto the glued area, following your pattern. Work in small sections to ensure the glue doesn’t dry before you finish.
- Experiment with color (optional): If using different colored seeds, create distinct sections or add details within your design. You can also paint individual seeds before gluing them for a unique touch.
4. Yarn Wonderland: Cozy Up with a Fall Garland
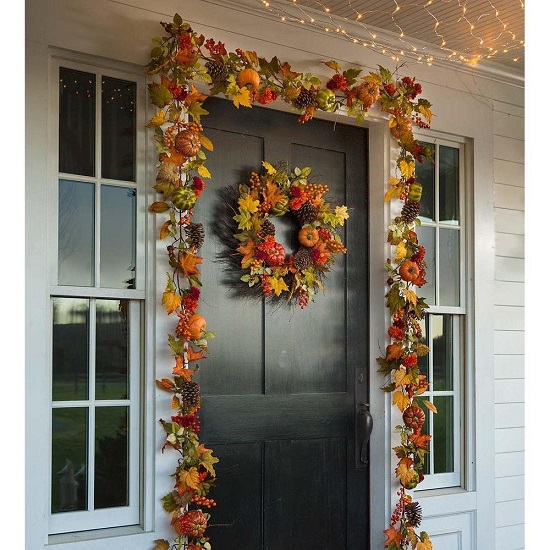
Warmth and comfort are quintessential elements of fall. Capture that coziness with a Hand-Woven Yarn Garland featuring classic autumnal shapes.
Materials:
- Cardstock or thick cardboard
- Scissors
- Yarn in various fall colors (orange, yellow, red, brown, etc.)
- Tapestry needle (optional)
- Twine or ribbon for hanging
Instructions:
Draw and cut out shapes: On the cardstock, draw fall-inspired shapes like leaves, pumpkins, acorns, or even owls. Cut them out carefully, ensuring smooth edges.
- Wrap it up!: Choose a yarn color and start wrapping it around the edge of a shape. You can wrap continuously, tucking the end under as you go, or use a tapestry needle to weave the yarn through pre-punched holes for a neater finish.
- Color variations: Change yarn colors to create stripes, patterns, or different sections within each shape. Get creative and experiment!
- String it up: Once all your shapes are yarn-wrapped, tie a piece of twine or ribbon through the top of each one. String them together at desired intervals, creating a garland of colorful, cozy fall cheer.
- Display: Hang your yarn garland across a mantelpiece, doorway, or window. Drape it over a bookshelf or even use it to decorate a fall-themed centerpiece. Its inviting texture and warm colors will add a touch of rustic charm to your space.
5. Fabric Fairytale: Hand-Printed Pumpkin Patch
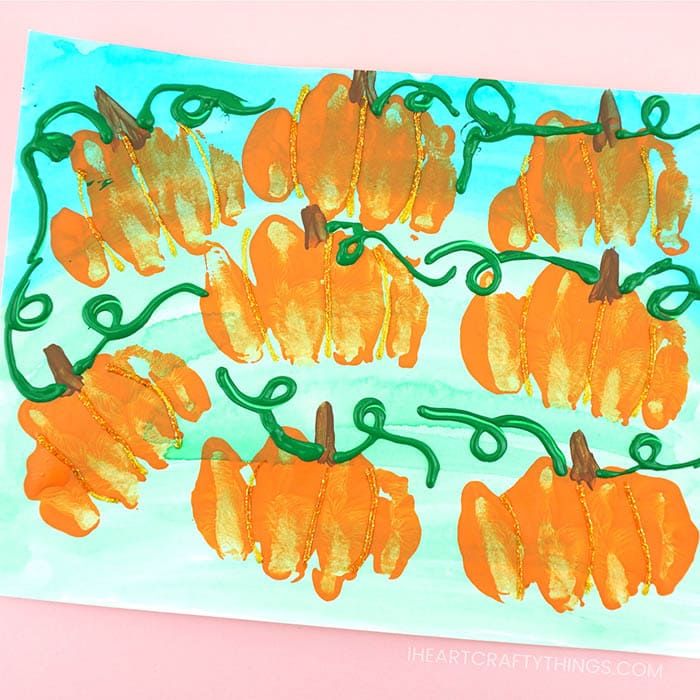
Move beyond traditional carving and embrace the versatility of fabric with Hand-Printed Fabric Pumpkins.
Materials:
- Fabric scraps in various fall colors and textures
- Potatoes or leaves (for stamping)
- Fabric paint in fall colors
- Scissors
- Needle and thread (or sewing machine)
- Stuffing (cotton, batting, etc.)
Instructions:
- Create your stamps: Cut potatoes or leaves in half, creating flat printing surfaces. Carve simple designs like stars, stripes, or leaf veins onto the potato halves. Leaves can be used directly for their natural patterns.
- Prepare the fabric: Cut out pumpkin shapes from your chosen fabric scraps. Ensure you have two pieces per pumpkin (front and back).
- Paint and print: Apply fabric paint to your potato or leaf stamps. Press them firmly onto the fabric, creating unique patterns on both pumpkin pieces. Experiment with different colors and placements.
- Sew it up: Place the two printed fabric pieces right sides together. Sew around the edges, leaving a small opening for stuffing. Turn the pumpkin right side out and stuff it with cotton or batting. Close the opening securely.
- Display: Create a whole pumpkin patch of various sizes and designs! Arrange them on a table, windowsill, or even use them as decorative throw pillows. Their whimsical patterns and soft textures will add a touch of playful coziness to your fall décor.
6. Sensory Symphony: Fall in a Bottle
Engage the senses and create a calming ambiance with a Fall Sensory Bottle. This project is perfect for kids and adults alike!
Materials:
- Clear glass bottle with a tight lid
- Water
- Clear glitter
- Fall-themed objects (mini pumpkins, acorns, leaves, cinnamon sticks, etc.)
- Food coloring (optional)

Instructions:
- Gather your treasures: Choose small, fall-themed objects that will fit comfortably in your bottle. Consider using a variety of colors, textures, and shapes for added sensory interest.
- Fill the bottle: Add water to the bottle, leaving some space at the top. You can also add a few drops of food coloring for a subtle tint.
- Glitter magic (optional): Pour in a generous amount of clear glitter for a mesmerizing, sparkly effect.
Time to assemble: Carefully drop your chosen objects into the bottle. Use a funnel if needed to avoid spills. - Seal it tight: Secure the lid tightly to prevent leaks. Shake the bottle gently to mix the contents and create a swirling display of fall colors and textures.
- Display and enjoy: Place your sensory bottle on a shelf, desk, or anywhere you can relax and observe its calming movement. As you shake it, watch the glitter dance, the leaves twirl, and the miniature pumpkins bob, creating a mesmerizing and relaxing sensory experience.
These six unique arts and crafts ideas are just a starting point for your fall creativity. With a little imagination and readily available materials, you can transform everyday objects into captivating works of art, celebrate the beauty of the season, and bring a touch of autumnal magic into your home.
