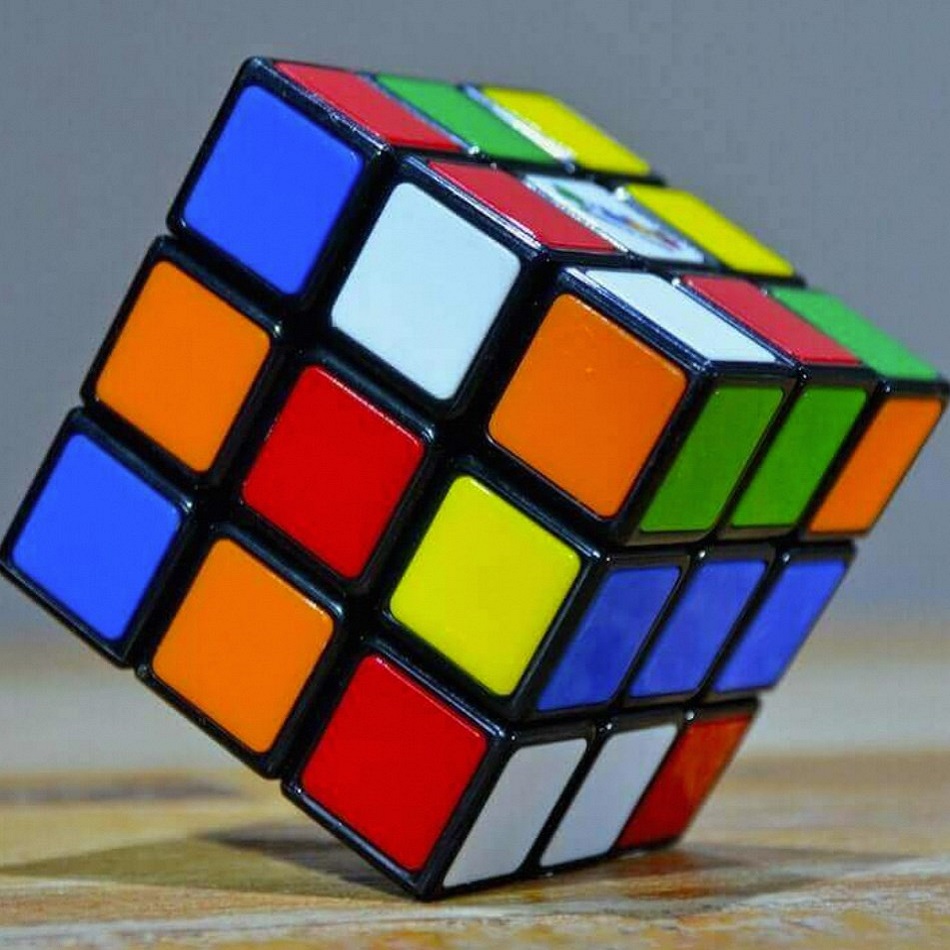
The Rubik’s Cube, a seemingly simple 3×3 puzzle of colored squares, has baffled and intrigued people for decades. But with a little dedication and this beginner’s guide, you’ll be well on your way to conquering this classic challenge. This guide will break down the solution into four manageable parts, introducing you to a step-by-step method to leave you with a perfectly solved cube.
Part 1: Understanding the Cube
Pieces and Notation:
To communicate cube moves efficiently, we use a notation system, as the Rubik’s Cube is made up of 26 smaller pieces: 8 corner pieces (each with three colored stickers), 12 edge pieces (each with two colored stickers), and 6 center pieces (each with one colored sticker). A single letter represents a 90-degree turn of a face (R for right, L for left, U for up, D for down, F for front, and B for back). An apostrophe (‘) signifies a counter-clockwise turn, and a number (e.g., R2) indicates two consecutive turns in the same direction.
Solving Strategy:
When it comes to solving a Rubik’s Cube, various methods exist, each with its own unique approach. However, the method we will delve into here is particularly suited for beginners, employing a systematic layer-by-layer strategy. This approach entails solving the cube’s layers one by one, starting with the first layer, then progressing to the second layer, and culminating with the top layer. The key principle of this method is to fully solve each layer before tackling the next layer. By adhering to this approach, beginners can systematically build their understanding of the cube’s mechanics and gradually progress through the various stages of solving, ultimately leading to a comprehensive and methodical mastery of the Rubik’s Cube.
Part 2: Conquering the First Layer
Building the White Cross:
Begin by selecting a color, commonly white, to serve as the solved top face of the Rubik’s Cube. The initial task is to form a white cross on the top face, ensuring that you accurately position each white edge piece with its white sticker situated on the top and the corresponding colored sticker on the side facing outward. While this may seem daunting, there are specific algorithms, consisting of precise sequences of moves, designed to address various white edge configurations. Carrying out these algorithms effectively places the white edge pieces in their correct positions.
With consistent practice, you will begin to develop an intuitive understanding of these algorithms, enabling you to apply them seamlessly as you progress. As you become more adept at recognizing and handling different white edge configurations, you will steadily enhance your skills and move closer to achieving the critical milestone of forming the white cross on the Rubik’s Cube.
Completing the First Layer:
After successfully forming the white cross, the next step involves positioning the four corner pieces on the first layer. These corner pieces have a white sticker and two additional colors. To correctly position them, it’s crucial to align the non-white stickers on each corner piece with the corresponding center pieces on the first layer that share the same colors. While this step may seem intricate, rest assured that specific algorithms are available to aid in solving the placement of the corner pieces. As you continue to practice and familiarize yourself with these algorithms, memorization becomes increasingly manageable, allowing you to confidently and efficiently manipulate the cube to position the corner pieces accurately. By systematically applying these algorithms, you’ll gradually enhance your ability to navigate the complexities involved in solving the Rubik’s Cube, ultimately advancing towards completing the first layer with greater ease and proficiency.
Part 3: Tackling the Second Layer
Positioning the Second Layer Edges:
The second layer edges on the Rubik’s Cube comprise four pieces, each featuring a white sticker on the top and another distinct color on the bottom. The objective at this stage is to shift these edge pieces to their designated slots on the second layer, aligning the bottom color of each edge piece with the corresponding center piece below it. While the process may seem complex, there are several algorithms designed to solve different configurations of second-layer edge pieces. However, a general technique involves strategically maneuvering an edge piece to the bottom layer and then leveraging the already solved first layer to properly position it within the second layer. Mastering this technique will equip you with the necessary skills to efficiently manipulate the cube and facilitate the movement and alignment of the second-layer edge pieces, ultimately bringing you closer to completing the Rubik’s Cube-solving process.
Orienting the Second Layer Edges:
After making sure that the second-layer edges are in their designated slots, it is possible for them to be twisted, causing the colored stickers to face the wrong directions. Nevertheless, there is a handy solution to remedy this issue. By utilizing a specific algorithm, it is possible to rotate any of the second-layer edge pieces repeatedly until they are properly aligned in their correct positions. This algorithm serves as a useful tool in the Rubik’s Cube solving process, offering a straightforward method to address and rectify any misaligned or incorrectly oriented second-layer edge pieces. Effectively leveraging this algorithm simplifies the process of correcting any twists and aligning the second-layer edges, ultimately contributing to the successful completion of this stage in solving the Rubik’s Cube.
Part 4: Solving the Last Layer
Building the Yellow Cross:
Now, we need to shift our attention to the yellow face of the Rubik’s Cube, as it is the layer that we aim to solve last. The initial objective in this step is to form a yellow cross on the top face, mirroring the approach used to establish the white cross in the cube’s first layer. To achieve this, you can employ a series of algorithms to resolve different yellow edge orientations and configurations, ultimately leading to the creation of the desired yellow cross. This process is critical, as it sets the foundation for the subsequent steps in solving the cube, effectively guiding the solver towards the final goal of completing all sides of the Rubik’s Cube.
Solving the Yellow Layer:
In the ultimate stage of solving the Rubik’s Cube, the focus shifts to completing the top yellow layer. This entails not only placing the yellow corner pieces in their designated slots but also orienting them so that all the colored stickers align with the corresponding center pieces. It’s worth noting that accomplishing this stage involves utilizing several algorithms to both position the yellow corners correctly and then orient them into their proper alignment. Through practice and familiarity with the cube, you’ll progressively develop the ability to discern the specific scenarios presented and effectively apply the appropriate algorithms to address them. This step-by-step process enables you to gain a deeper understanding of the Rubik’s Cube’s intricacies, empowering you to systematically solve the challenge posed by the top yellow layer and ultimately complete the entire cube.
Going Further:
Solving a Rubik’s Cube can be a rewarding and engaging challenge. This beginner’s guide provides a roadmap, but there are many resources available to help you on your journey. Numerous websites and [YouTube videos] offer tutorials with clear visual demonstrations of the algorithms. With dedication and practice, you’ll soon be solving the Rubik’s Cube with ease and impressing your friends with your newfound cubing skills.